Best Pumpkin Carving Kits
Our Review Process
Don't Waste Your Money is focused on helping you make the best purchasing decision. Our team of experts spends hundreds of hours analyzing, testing, and researching products so you don't have to. Learn more.

Our Picks For The Top Pumpkin Carving Kits
- 1. Greatever Professional Heavy Duty Pumpkin Carving Kit, 7 Piece
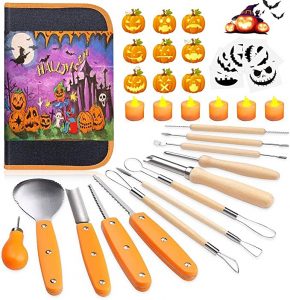
- 2. COLORCASA Halloween Pumpkin Carving Kit
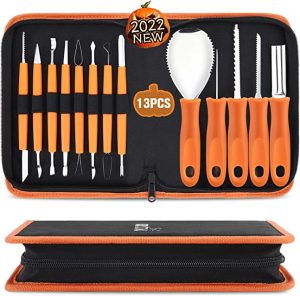
- 3. Elmchee Professional Pumpkin Carving Kit, 13 Piece
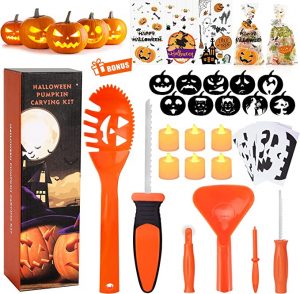
- 4. Bright Hobby Pumpkin Carving Kit With Stencils
- 5. Feyuan Professional Pumpkin Carving Kit, 13 Piece
- 6. SKINOSM Pumpkin Carving Kit & Accessories
- 7. Luditek Professional Pumpkin Carving Kit, 11 Piece
- 8. CHRYZTAL Professional Pumpkin Carving Kit, 13 Piece
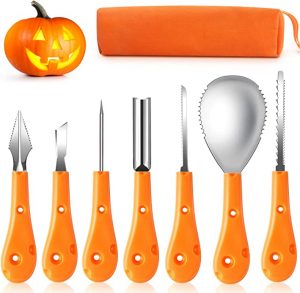

The seven tools in this kit are made to be ergonomic, compact and durable. You get everything needed to etch and cut designs as well as scoop out the contents. The kit features an orange carrying pouch for convenience.
Includes the EssentialsYou'll find this option useful if you want a set of popular carving tools that will last a long time and feel comfortable to use.
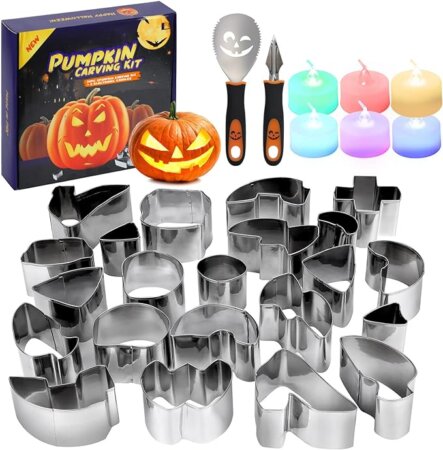
Including two dozen punchers and 6 candles, this kit skips the hassle of needing to use saws to more tediously cut creative shapes into the pumpkin.
Beginner-Friendly OptionThe easy-to-use puncher shapes make this kit a good choice for children and beginners to pumpkin carving.
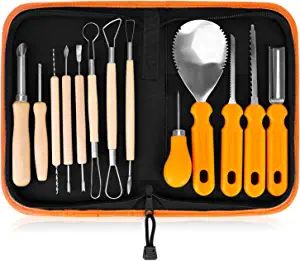
Featuring a variety of 13 tools in a handy zippered case, this kit serves both beginners and advanced carvers alike. It includes basic tools along with some for punching into and engraving the pumpkin. You also get a few scooper options.
Versatile for Creative DesignsIf you want the most flexibility with ways you can cut designs into pumpkins, this kit offers a large tool collection to suit the job.
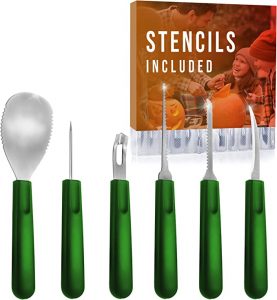
This kit includes some sturdy tools for cutting your pumpkin open, scooping out the contents and using saws to make detailed designs. You also get a stencil collection with seasonal shapes that guide you.
For Easier DesignsConsider this all-in-one kit if you prefer getting some stencils along with pumpkin tools to make easier designs.
Buying Guide
Pumpkin carving is a fun Halloween activity that suits the whole family and offers plenty of opportunities to make creative designs. While you could try tools like spoons and knives from home, getting a pumpkin carving kit with specially designed tools will make the process easier and more convenient. These kits usually include a variety of cutters, tools to help you scoop out the pumpkin and maybe even extras like stencils that make creating designs easier.
What to Look For
Cutting tools are essential for both opening the pumpkin and carving the designs. A good kit includes saws or knives in different sizes. The largest comes in handy for opening the pumpkin, while you’ll use the smaller saws to craft the actual design. You’ll often also come across poker tools with one or multiple sharp points. These let you create small holes or transfer patterns from paper stencils. You’ll likely want a kit with sharp tools so you’ll strain your hand less, but you might want something duller if kids will help out.
You’ll want a kit that has a sturdy scooper so that the process of cleaning the pumpkin out becomes less tedious. You can find scoopers in different sizes, but getting a large one helps the process go by more quickly since you can scoop out more at a time. While both metal and plastic scoopers exist and can handle the job, you’ll likely find a metal one has a better chance of lasting for multiple Halloweens to come.
Some kits include either punchers or stencils for making designs easier. Punchers look like cookie cutters, and you’d use a mallet to press them into the pumpkin and make the cutout. Stencils, on the other hand, can come in paper and plastic forms that you can either stick to the pumpkin or hold while you’re working. You’d then use a cutting tool to carve the stencil’s design.
You might be interested in some other items that can come with pumpkin carving kits. For example, you might find tools that let you engrave designs into the front of the pumpkin as well as stickers and special tools for sculpting. A carrying bag for your pumpkin carving tools would also come in handy.
If you’re apprehensive about using any sharp objects for decorating your Halloween pumpkins, check out these No-Carve Ways to Decorate Pumpkins.

More to Explore
- While carving pumpkins is fun, it also involves a mess for which you should prepare. You can start by covering the surface with some plastic or newspaper and placing a bowl or bucket nearby to put the pumpkin guts in. You might opt to set up your work area outside to avoid messing up the inside your home.
MORE: 10 Ways to Use Pumpkin Guts
- To clean out your pumpkin, you’ll first need to use one of your kit’s saws to cut a round hole either on the top or bottom and then remove that piece. Make sure the cut is big enough for you to get inside the pumpkin and scoop out the insides properly. You’ll then use your scooper to remove the pumpkin’s contents along with a knife as needed to help separate things. After the inside is clean, you’re ready to start adding the details.
- The pumpkin seeds removed during the cleaning process can make a tasty treat if you’d rather not throw them out.
- You should plan your design before you start carving it. This means experimenting with the positions of any stencils you plan to use or drawing outlines for shapes you’ll cut without stencils. Feel free to be creative and go beyond a simple face design. You’ll also likely want to use tape to secure stencils before carving.
- Whether or not you use stencils, go slowly and carefully as you carve shapes into your pumpkin. You’ll also want to watch your hand so you don’t accidentally cut yourself.
- It’s unsafe to let young children use sharp carving tools, and even older children need supervision during the process. You can always let your children scoop out the pumpkin instead for a safer activity.
- You don’t have to stop decorating your pumpkin after you’ve completed the carving process. You can put candles inside, paint the pumpkin or add details like stickers.
- A pumpkin won’t last long after you carve it, so plan your activity’s timing appropriately. To possibly get a bit more time, you can find preservation sprays or make your own with bleach and water. Petroleum jelly can also help.
Latest Reviews