The Best Soap-Making Supplies
Our Review Process
Don't Waste Your Money is focused on helping you make the best purchasing decision. Our team of experts spends hundreds of hours analyzing, testing, and researching products so you don't have to. Learn more.
Our Picks For The Top Soap-Making Supplies
- 1. Our Earth’s Secrets Goats Milk Soap Base Soap-Making Supplies
- 2. Norpro Dishwasher Safe Funnel Pitcher Soap-Making Supplies
- 3. Kelly Cable The Natural Soap-Making Book For Beginners
- 4. B Me Reusable Kids Activity Kit Soap-Making Supplies
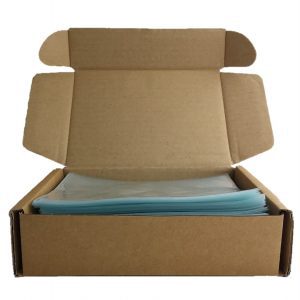
- 5. Supply Friend Clear Shrink Wrap Bags Soap-Making Supplies, 500-Count
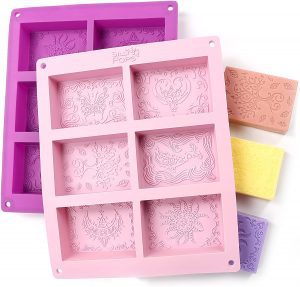
- 6. The Silly Pops Silicone Soap Molds Soap-Making Supplies, 2-Count
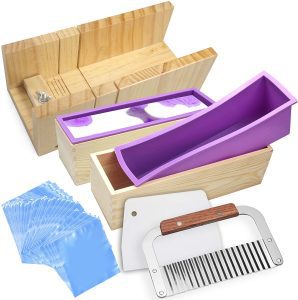
- 7. Voulosimi Soap Loaf Cutter & Mold Soap-Making Supplies
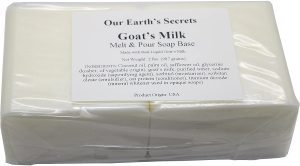

Goat’s milk is great for keeping the skin soft. This soap base contains 10 percent goat’s milk in addition to coconut oil and palm oil. It is soy bean free.
Softens SkinThis soup base contains 10 percent goat’s milk.
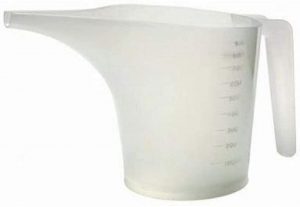
This funnel pitcher is designed for no-drip precision, perfect for soap making. It is translucent for quick measuring. The cup has a capacity of 28 ounces.
No-Drip PrecisionThis funnel pitcher is an ideal design for making soap.
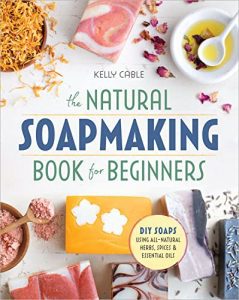
If you’re new to soap making, this book is a great way to learn the process. It covers all the basics and includes step-by-step tutorials. The book comes with over 55 all-natural recipes.
Perfect for NewbiesThis soap-making book is ideal for beginners to the craft.
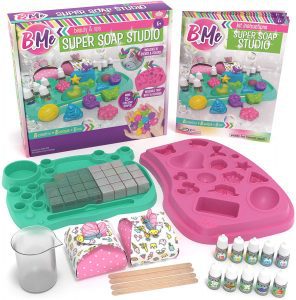
Kids can make up to 15 different shapes with this fun soap-making kit. It comes with everything you need, including scents, dyes, mixing sticks and a mixing cup. The kit includes a mess-free soap creation station.
Makes 15 ShapesThis soap-making kit for kids will keep them entertained.
Buying Guide
Soap making is both an art and a science that can be enjoyed by kids and adults alike. Whether you’re starting a small-batch soap-making business, just trying out a new hobby or doing a fun activity with your kids, you’ll need to get the right soap-making supplies. There are three main types of soap-making processes you can do, and the supplies you need will depend on which path you’re taking.
The easiest soap making method is the melt and pour process. As the name suggests, you use a pre-made soap base that is melted and add in your essential oils. Then, you pour it into a mold and leave it to harden. In this method, you don’t need to deal with lye so the soap is ready without hassle in just a few hours. The hot process of making soap uses heat in the saponification process and takes about a week to cure the soap. The cold process is another from-scratch process that takes much longer, about four to six weeks, for the soap to cure. Both the hot and cold processes use lye in the method.
The melt and pour soap-making process is the most common one for beginners and kids. For this process, you will need molds, which include loaf and silicone varieties. Loaf molds are similar in size and shape to a loaf baking pan, and require you to slice the soap to get each individual bar. Silicone molds don’t need you to cut the soap once it has hardened. In addition to the molds, this process requires soap bases which are made from glycerin, shea butter, cocoa butter, goat’s milk or other ingredients. You’ll also need tools such as a thermometer, rubber spatula, measuring cups and measuring spoons.
What to Look For
- If you’re adventuring into a hot or cold soap process, you’ll need lye. Keep in mind that lye is difficult to work with and you cannot use glass mixing bowls or measuring cups with this ingredient. This is because lye can corrode the glass which can cause it to shatter. It’s best to use plastic or metal mixing bowls and spoons when you are dealing with lye. Be sure not to use any utensils or bowls that you use for eating for lye or vice versa, as you never want to ingest this ingredient. Remember to store lye correctly in an air tight container that is out of reach for kids or pets. Label the container clearly and keep it in a cool, dark place.
- Did you know that caustic alkali compound that can damage your eyes, skin or lungs if it is ingested? When working with lye, remember to do it in a well-ventilated place that is not close any kids or pets. It’s also important to invest in safety materials such as safety goggles, protective gloves, lab coat, oven mitts, apron and a protective mask. If you do not have a well-ventilated workspace, it’s best to stick with the melt and pour soap-making process that does not involve lye.
- The soap-making supplies list can grow quickly, so it’s important to have an organization system to keep everything neat and tidy and easy to find. Group similar items together and keep them in a basket or tub, such as all essential oils in one place and all colorants in one place. Be sure to clearly separate kitchen bowls and utensils from the soap-making ones so they never mix.
More to Explore
Soap is a fun past-time these days, but that wasn’t always the case. In fact, long ago, making soap was a quite the dirty business. Ancient Mesopotamians were pioneers in soap making, using cooked fat rendered from slaughtered animals such as cows, sheep or goat. They mixed the fat with water and an alkaline substance such as lye, which comes from wood ashes. Mixed together, this substance created a smelly and greasy mixture that actually lifted away dirt from other materials. However, this early soap was not used on bodies, only on cloth fibers.
Latest Reviews