The Best Peel & Stick Backsplash Tile
Our Review Process
Don't Waste Your Money is focused on helping you make the best purchasing decision. Our team of experts spends hundreds of hours analyzing, testing, and researching products so you don't have to. Learn more.

Our Picks For The Top Peel & Stick Backsplash Tiles
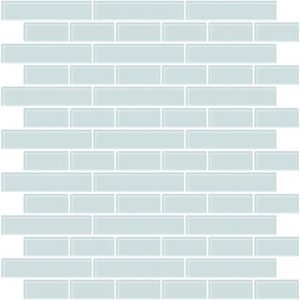
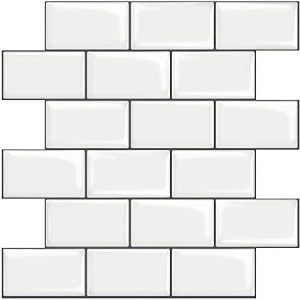
- 1. Art3d 10-Piece Shiny White Subway Peel & Stick Backsplash, 12×12-Inch
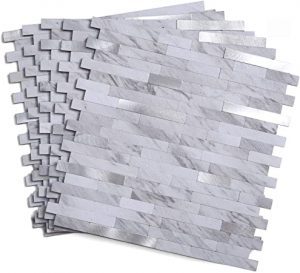
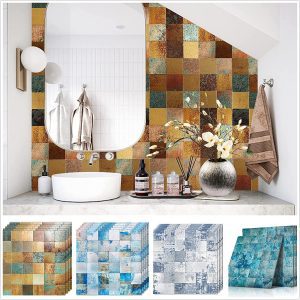
- 2. AULIGET 100-Piece 3D Distressed Wood Texture Peel & Stick Backsplash Tile, 3×6-Inch
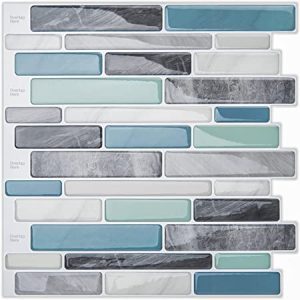
- 3. OYASIMI 10-Piece Stone-Look Peel & Stick Backsplash Tile, 11.85×11.89-Inch
- 4. Aspect Real Stone Quartz-Look Peel & Stick Backsplash Tile, 5.9 x 23.6 x 1/8-Inch
- 5. Vamos Tile 10-Piece Glass-Look Peel & Stick Backsplash Tile, 12×12-Inch
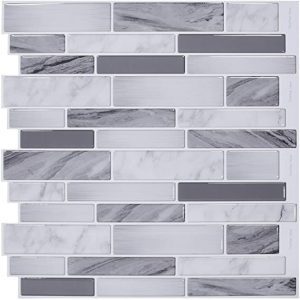
- 6. Miscasa 5-Piece Faux Marble Peel & Stick Backsplash Tile, 11.5×11.7-Inch
- 7. LONGKING 10-Piece Heat Resistant Marble-Look Peel & Stick Backsplash Tile
- 8. InHome NH2361 Glossy Vinyl Sea Glass Peel & Stick Backsplash Tile, 10×10-Inch
- 9. STICKGOO 10-Piece Extra-Thick Subway Peel & Stick Backsplash Tile
- 10. HomeyMosaic 10-Piece Bronzed Square Metal Peel & Stick Backsplash Tile
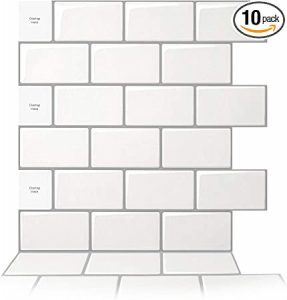

Available in three marble options and a white option resembling grout, these rectangular 3D tiles are simple to cut and install. They can handle water and heat and allow for easy cleaning.
Simple to UseYou get a simple installation process, easy maintenance and flexible layout options with these rectangular tiles.
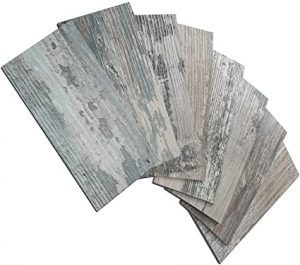
AULIGET
100-Piece 3D Distressed Wood Texture Peel & Stick Backsplash Tile, 3x6-Inch
Coming in 13 wood designs, these tiles are made of a PVC material to provide a wood look with the convenience of plastic. It's durable and can handle high temperatures, scratches and splashes.
Large Selection of DesignsIf you like the appearance of wood, this plastic alternative comes in many grain styles and is made to last.
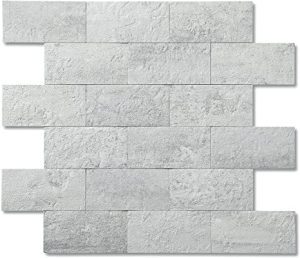
These peel and stick tiles come in five classic stone colors including beige, white and three gray shades. You don't have to worry about them being hard to clean or getting damaged from liquids that splash.
Classic DesignThese tiles are a great choice when you want to create the appearance of a stone wall without a lot of effort.
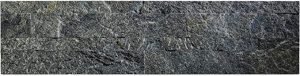
As an alternative to vinyl and PVC tiles resembling stone, this option features the real thing and offers high durability. It's also made to be thin so that it's not too hard for you to cut. You can choose from nine colors and stone options.
Made of Durable MaterialsConsider this tile option if you want to give your kitchen a unique look and prefer the durability you get with real stone.
Buying Guide
If you’d like to add a stylish backsplash in your kitchen, using peel and stick tiles makes the process simpler and faster than using tiles with a permanent adhesive. It’s usually just a matter of getting enough tiles to cover the surface, doing some minor prep work and then pressing down the tiles on your kitchen’s wall. You still get a very aesthetic result as well since you’ll find peel and stick backsplash tiles in various styles and materials, and you can customize the layout to fit your tastes and needs.
Deciding which material your peel and stick tiles are made of is crucial. This choice will affect everything from the installation and appearance of your backsplash to its durability and maintenance.
If you’re looking for something easy to cut and clean, vinyl and PVC are good choices that come in numerous designs. Gel tiles are another easy-to-cut option that provides an interesting 3D appearance. While harder to cut, stone tiles offer a unique earthy and textured look, while glass files look fancy and metal tiles are highly durable. On the other hand, wooden tiles can offer a classic look for your kitchen, but they may need sealed to avoid damage from splashes.
You’ll also want to think about what kind of tile design you prefer for your backsplash. When doing so, think about what kind of look would match your kitchen and work well for your intended placement pattern.
To keep things simple and allow for flexibility with placement and the layout, you could go with rectangular or hexagonal tiles in a single color. For a more complex look, consider tiles with a grid design that can have various patterns. If you’re going with tiles that resemble stone, you’ll find options with tiles that slightly vary for a natural appearance. Other tile design options mix up the colors and lengths to resemble a brick layout or have zigzagged patterns.
What to Look For
- Keep in mind you can mix and match different styles and sizes of backsplash tiles for a unique appearance. For example, you might buy a mix of white and black tiles to make a checkerboard backsplash pattern. You might also decide to mix different stone colors or even create a backsplash with a mix of grid tile designs.
- To determine how many tiles you need, first measure the width and length of your kitchen’s backsplash and multiply the values to get the total square footage. You can then check with the tile manufacturer to see how many square feet one box (or a single large tile) covers and divide the backsplash area by that number to get the tile boxes (or individual tiles) needed. Lastly, you should buy an extra 10 to 20 percent of the tiles to account for waste.
- As an essential prep step, always clean your backsplash area to remove grease and any other residue. After the area gets dry, you can start working.
- Before installing the backsplash tile, consider your desired layout and the space of the area. It helps to physically lay out the tiles on the floor in order, if possible, so you can simply grab one, peel off the back and then press the tile down on your backsplash area.
- You can expect to need to cut some of the tiles to fit properly, and the cutting method depends on the tile material. For example, simple scissors will cut vinyl tile, while harder materials can require a saw, cutting wheel or utility knife.
- If you make a mistake putting a piece of the peel and stick tile down, you can always rearrange the pattern or cut other pieces to fit. If you had just put it down and not pressed down too hard, you might also have luck removing it.
- After you’ve placed the tiles, go over them and press down to ensure a good attachment. You can find a special roller for this purpose too.
- Depending on the tile material and area around the backsplash, you might want to apply a sealant once you’re done with placement. Many tile materials can handle getting wet and can be cleaned easily, but wooden and natural stone tiles particularly may need to be sealed.
- If your backsplash gets dirty, you can usually just wipe it down with water.
More to Explore
Did you know that the kitchen backsplash likely dates back to the introduction of indoor plumbing? While you now might install one to make your kitchen look more stylish, the original backsplash was to simply keep splashed grease and water from damaging the wall.
Kitchen backsplashes have evolved to cover much more area in the kitchen. The early versions were minimalistic with a height of four inches. So, they didn’t resemble the extensive backsplash you might want above your stove, sink and counters.
The original backsplash used ceramic tiles and required a much more involved installation process. While you can still install permanent backsplash tiles, pressing down some peel and stick tiles offers a temporary solution and is a good DIY project to tackle.
Latest Reviews